How to Create Backup of Your Volume From Windows Machine on CODE-DE
In this tutorial you will learn how create a backup of your volume on CODE-DE FRA1-1 cloud. It allows you to save its state at a certain point in time and, for example, perform some experiments on it. You can then restore the volume to its previous state if you are unhappy with the results.
Those backups are stored using object storage. Restoring a backup will delete all data added to a volume after backup was created.
What We Are Going To Cover
Disconnecting the volume from a Windows virtual machine
Creating a backup of a volume
Restoring a backup of a volume
Reattaching a volume to your Windows virtual machine
Prerequisites
No. 1 Account
You need a CODE-DE hosting account with access to the Horizon interface: https://cloud.fra1-1.cloudferro.com/auth/login/?next=/.
No. 2 Windows VM
You must operate a Microsoft Windows virtual machine running on CODE-DE FRA1-1 cloud. You can access it using the webconsole (How to access the VM from OpenStack console on CODE-DE) or through RDP. If you are using RDP, we strongly recommend using a bastion host for your security: Connecting to a Windows VM via RDP through a Linux Bastion Host port forwarding on CODE-DE.
No. 3 Volume
A volume must be connected to your Windows virtual machine.
Disconnecting the volume from a virtual machine
Before creating a backup of your volume, disconnect it.
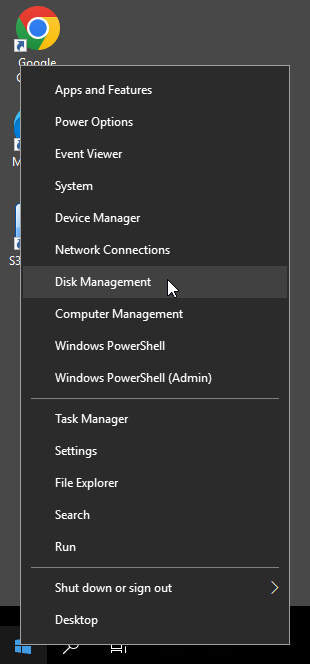
On your virtual machine, right-click the Start menu and select Disk Management.
A window similar to this should appear:
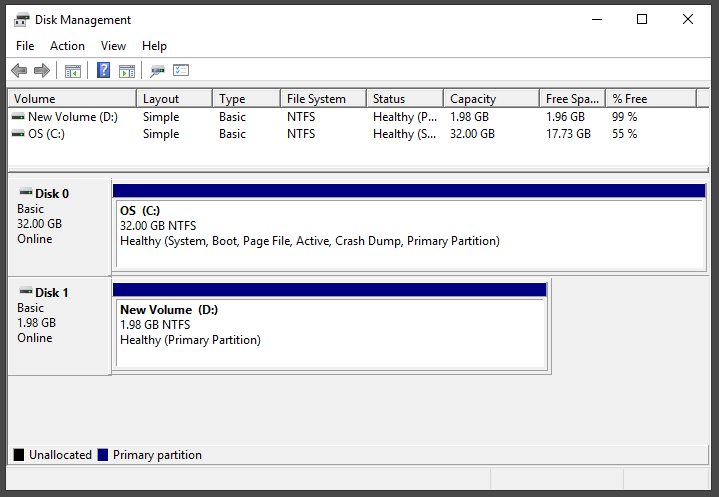
Right-click your attached volume and select Change Drive Letter and Paths…. The following window should appear:
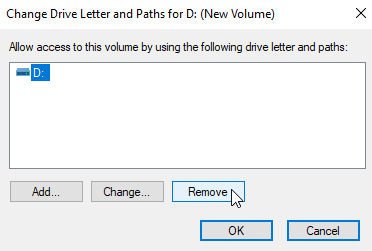
Select the drive letter or mount point of your drive and click Remove.
Note
If you receive the following warning:
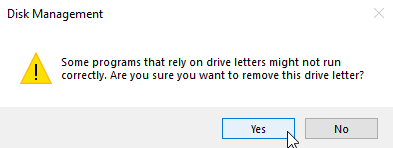
make sure that the removal does not break your workflow and click Yes.
Shut down the virtual machine and return to the Horizon dashboard: https://cloud.fra1-1.cloudferro.com/auth/login/?next=/
Go to Volumes > Volumes. You should see your volume there:
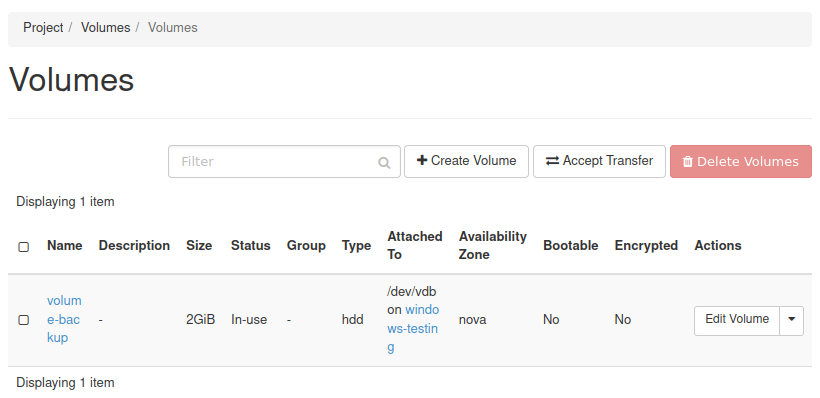
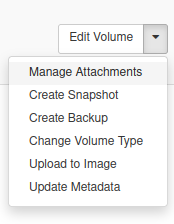
Select Manage Attachments from the drop-down menu in the Actions column for your volume:
The following window should appear:
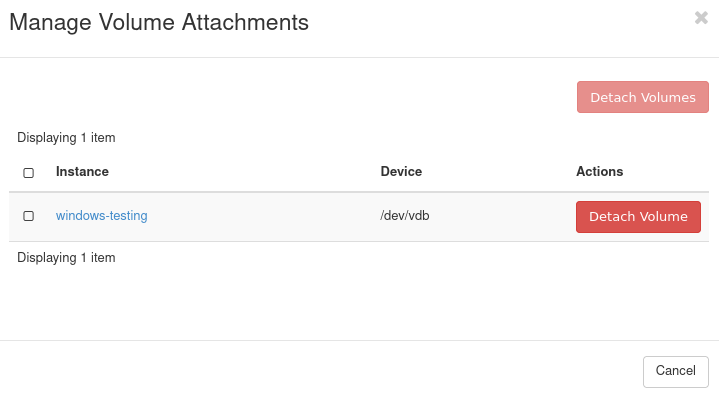
Click Detach Volume and confirm your choice.
Creating a Backup of Your Volume
Now that you have detached the volume from your virtual machine, you can make its backup by following these steps:
Go to Volumes > Volumes.
Choose Create Backup from the drop-down menu in the Actions column for your volume. You should get the following window:
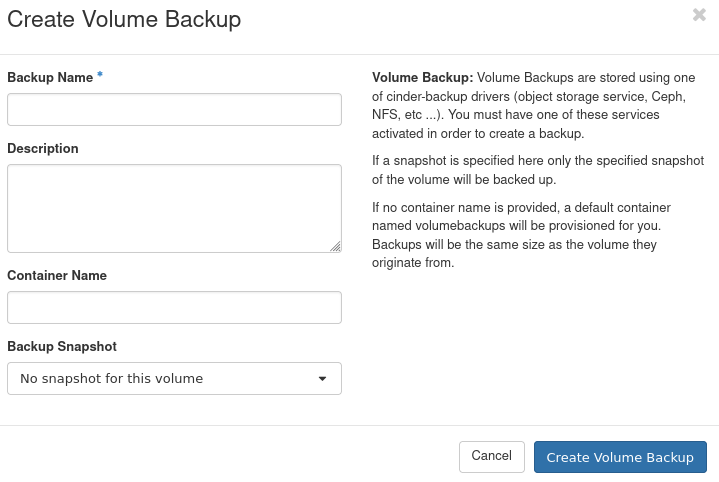
Enter the chosen name for your backup in the Backup Name text field. Optionally, you can provide its description in the Description text field. Once you’re ready, click Create Volume Backup.
Clicking Create Volume Backup initializes the process of backup creation and moves you to the Volumes > Backups section of the Horizon dashboard. There you should see that your backup is being created.
The time it takes to create the backup will vary.
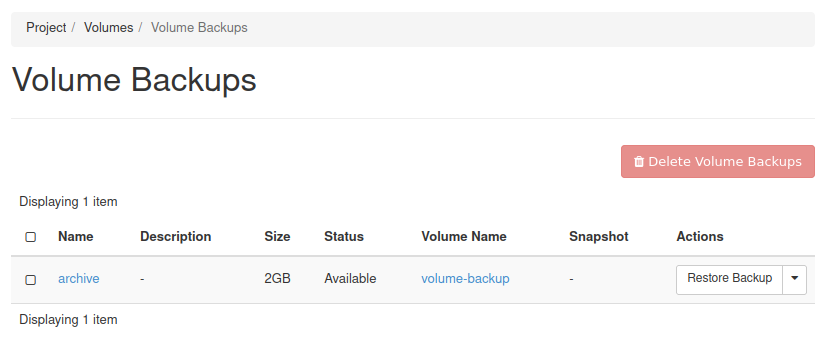
Once the process is over, you should see the status Available next to your backup:
Restoring the backup
There are two ways of restoring a backup:
You can overwrite an existing volume with the content of the backup. This will delete all data that currently resides on that volume.
You can create a new volume based on the content of the backup.
Go to Volumes > Backups section of the Horizon dashboard. In the Actions column of the appropriate backup, choose Restore Backup. The following window should appear:

Use Select Volume drop-down list to select the volume which your backup will replace. You can also create a new volume from that backup by choosing Create a New Volume.
In either case, click Restore Backup to Volume. This will initialize the process of restoring backup and move you to the Volumes > Volumes section of the Horizon dashboard.
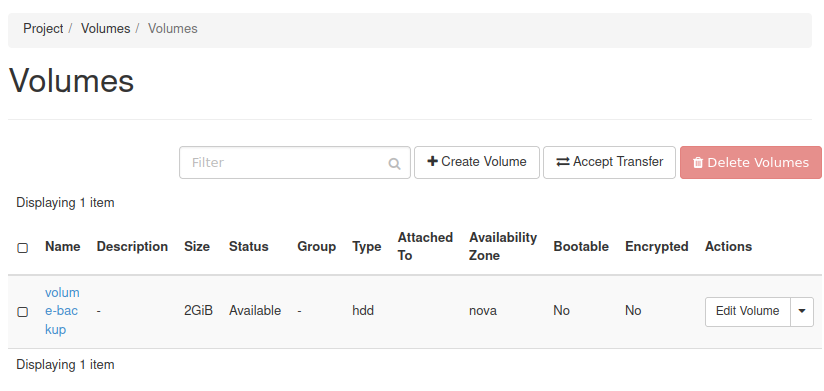
Once this operation is completed, you should see the status Available next to your volume:
You can now reattach the volume to your virtual machine.
Reattaching the volume to your virtual machine
In the Volumes > Volumes section of the Horizon dashboard, find the row containing your volume. Choose Manage Attachments from the drop-down menu in the Actions column for it. You should get the following window:
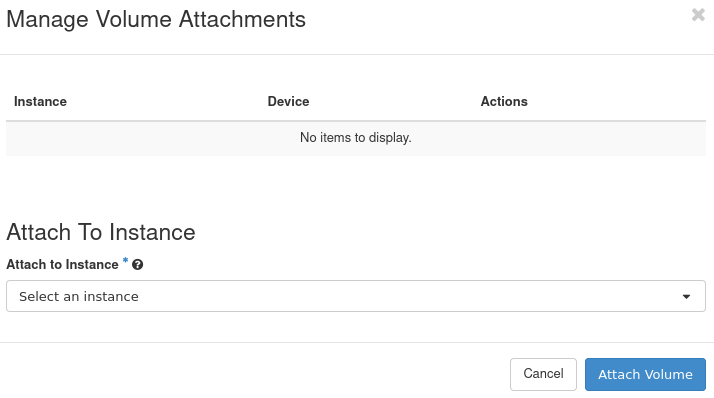
From the drop-down menu Attach To Instance choose the name of the virtual machine to which the volume was previously attached. Click Attach Volume.
Attaching should take up to a few seconds. Once it is completed, you should see appropriate information in the Attached To column for your volume:
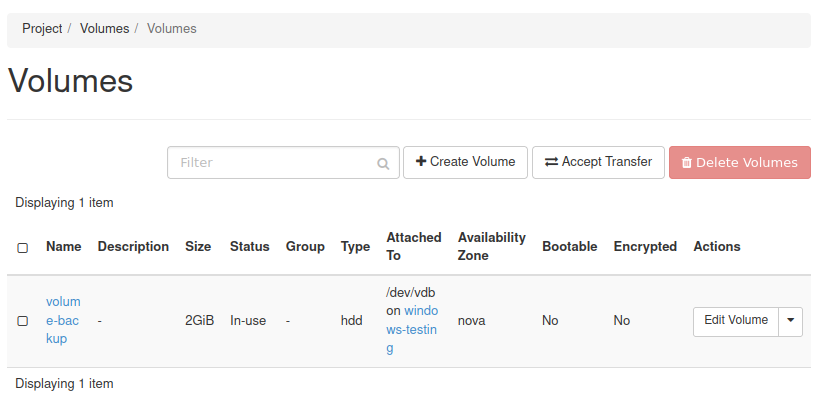
Go to Compute > Instances. Choose Start Instance in the row with the virtual machine to which the volume has just been attached. Login to your Windows VM using RDP or the webconsole (see Prerequisite No. 2).
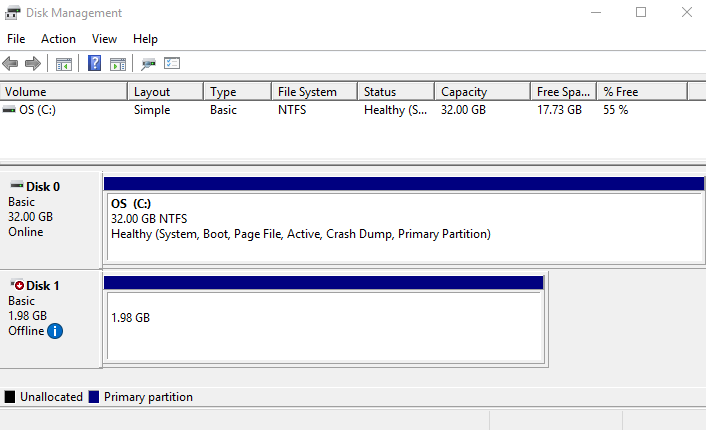
On your virtual machine, right-click the Start menu and select Disk Management. You should receive the following window:
Note
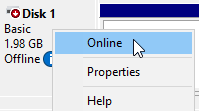
If at the bottom of the screen you see status Offline next to your attached volume, right-click it and choose Online from the context menu.
Right-click your attached volume and select Change Drive Letter and Paths…. The window titled Change Drive Letter and Paths for New Volume should appear:
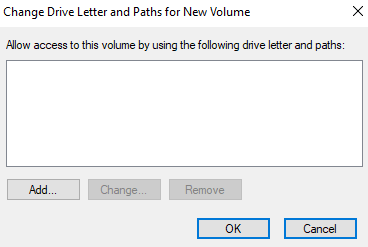
Click Add…. The following window should appear:
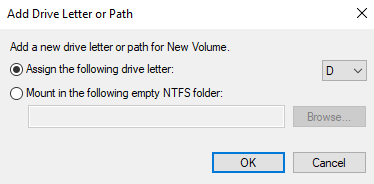
You can choose to either assign a drive letter to your drive or mount it in an empty folder.
If you want to assign a drive letter to that volume, choose the Assign the following drive letter: radio button. From the drop-down menu to its right choose a letter to which you wish to attach your volume. Confirm your choice by clicking OK.
If you want to mount the volume to an NTFS folder on your drive, choose Mount in the following empty NTFS folder:. Click Browse… and in the Browse for Drive Path window choose an empty folder in which you wish to mount it. Confirm your choice by clicking OK.
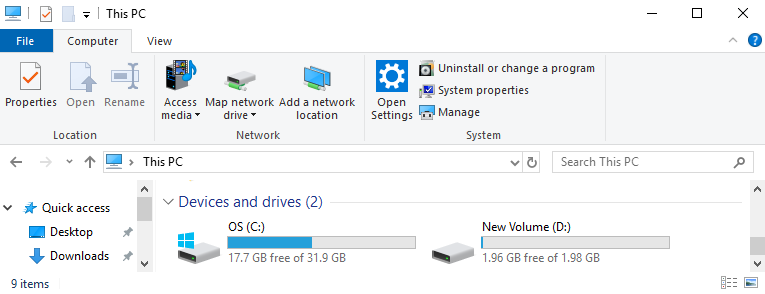
Your volume should now be mounted. If you chose to assign a drive letter, it should be visible in the This PC window:
