How to Get Access to the GUI of a OSGeoLive VM Using X2go?
You can get access to the GUI of a OSGeoLive VM using the application X2go for remote control.
X2go for remote control
X2go can be installed in Linux, Windows and macOS. The application can be downloaded from official website: https://wiki.x2go.org/doku.php
Installing x2go for Windows and MacOS
Installation instructions for Windows and macOS can be found on the above mentioned official website. It boils down to simple downloading and running of the installer.
Installing x2go on a cloud instance
To install x2go on your instance, connect to your VM via ssh:
ssh -i key eouser 194.152.XXX.XXX
Perform the following operations on the VM:
sudo add-apt-repository ppa:x2go/stable
sudo apt-get update
sudo apt-get install x2goserver x2goserver-xsession
sudo apt-get install x2golxdebindings
Client-side operations
Operations that need to be performed on the client-side on Linux:
sudo apt-get install x2goclient
Run x2go by command:
x2goclient
In the top menu select “Session”→ “New session … “
Complete the fields:
- Host
Floating IP of the VM
- Login
eouser (this account allows ssh connections)
- SSH port
22 (by default)
- Use RSA/DSA key for ssh connection
The path to your ssh private key file
- Session type
Choose “Custom desktop “ and type in “Command” field:
/usr/bin/lxsession -s Lubuntu -e LXDE
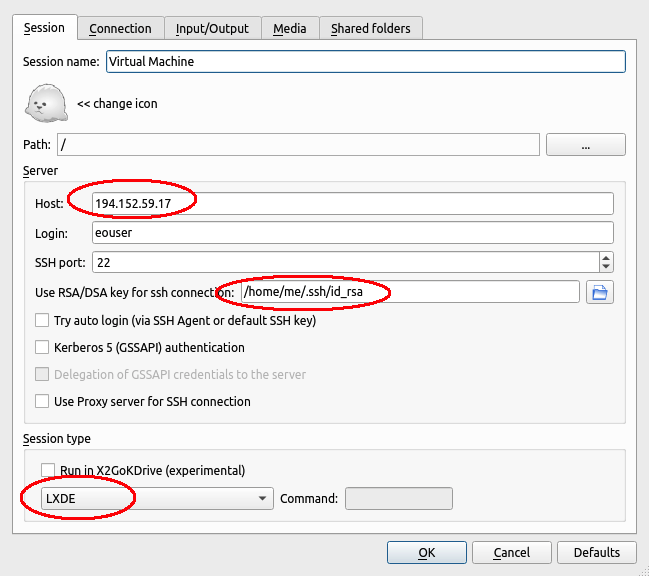
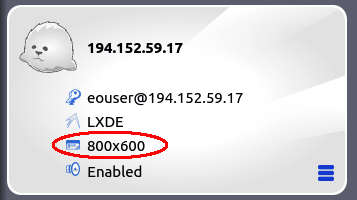
Click “OK”. If all fields have been filled out correctly, you should see a tile with information about the newly created session. You can change the resolution of the startup window from the context menu:
After starting the session, you will gain access to your virtual machine: