Accounts and Projects Management on CODE-DE-Lab
In OpenStack environments, a project represents an isolated workspace where users can create and manage cloud resources such as virtual machines, volumes, and networks. Each project has its own quotas, permissions, and billing configuration, allowing organizations to separate workloads and track resource usage independently.
This article explains how to use the CODE-DE-Lab Dashboard to manage your cloud projects and wallets, including project activation, wallet assignment, and billing verification.
What we are going to cover
Prerequisites
No. 1 Dashboard and Horizon access
Project and wallet management spans the CODE-DE-Lab Dashboard at https://tenant-manager.code-de.org and Horizon at https://identity.cloudferro.com/auth/realms/CODE-DE3/account/. If you do not yet have an active account, follow Registration and Setting up an Account, then confirm that you can sign in to both interfaces.
No. 2 Organization admin permission
The Cloud projects/Wallets and Wallets/Contracts options are available only to organization administrators. Check the access model in Tenant Manager users and roles on CODE-DE-Lab and continue while signed in with the admin role for the organization you intend to manage.
No. 3 Wallet or contract ready for billing
Have at least one wallet or contract available for the project. A prepaid wallet must contain sufficient funds, while a contract must be active for the required period; Wallets and Contracts Management describes the available billing modes and funding options. Before changing an assignment, identify the wallet or contract that should be current and, if applicable, the one that should take effect next.
No. 4 Project details for FRA1-3
CODE-DE-Lab currently provides only the FRA1-3 cloud region, so no region choice is required. Decide whether you are creating a project or changing an existing one; for an existing project, note its name and current wallet assignment so that you can select the correct row and avoid changing another project’s billing configuration.
Wallets (overview)
A wallet is the billing source for projects. You may have one shared wallet or multiple wallets for separation by project or contract.
Wallet states in the Dashboard
Term |
Meaning |
|---|---|
Current wallet |
The wallet used now for billing FRA1-3 or a specific project. |
Next wallet |
A scheduled replacement wallet that becomes current on its start date. |
Wallet inheritance |
If there’s a date gap, the project temporarily uses the parent account’s wallet. |
Examples
One wallet for FRA1-3: set the wallet on the FRA1-3 row so that new projects inherit it by default.
Separate wallets by workload: set different wallets on individual FRA1-3 projects to isolate costs between teams or environments.
Add funds to a wallet
Add funds to the selected wallet that will be used for the project.
For detailed guidance, refer to Wallets and Contracts Management.
If you are using the Pay-Per-Use (PPU) model, see /accountmanagement/How-to-buy-credits-using-pay-per-use-wallet-on-CODE-DE-Lab.
Cloud projects/Wallets view
After logging into https://tenant-manager.code-de.org, click Cloud projects/Wallets in the left menu bar to view the details of your projects.
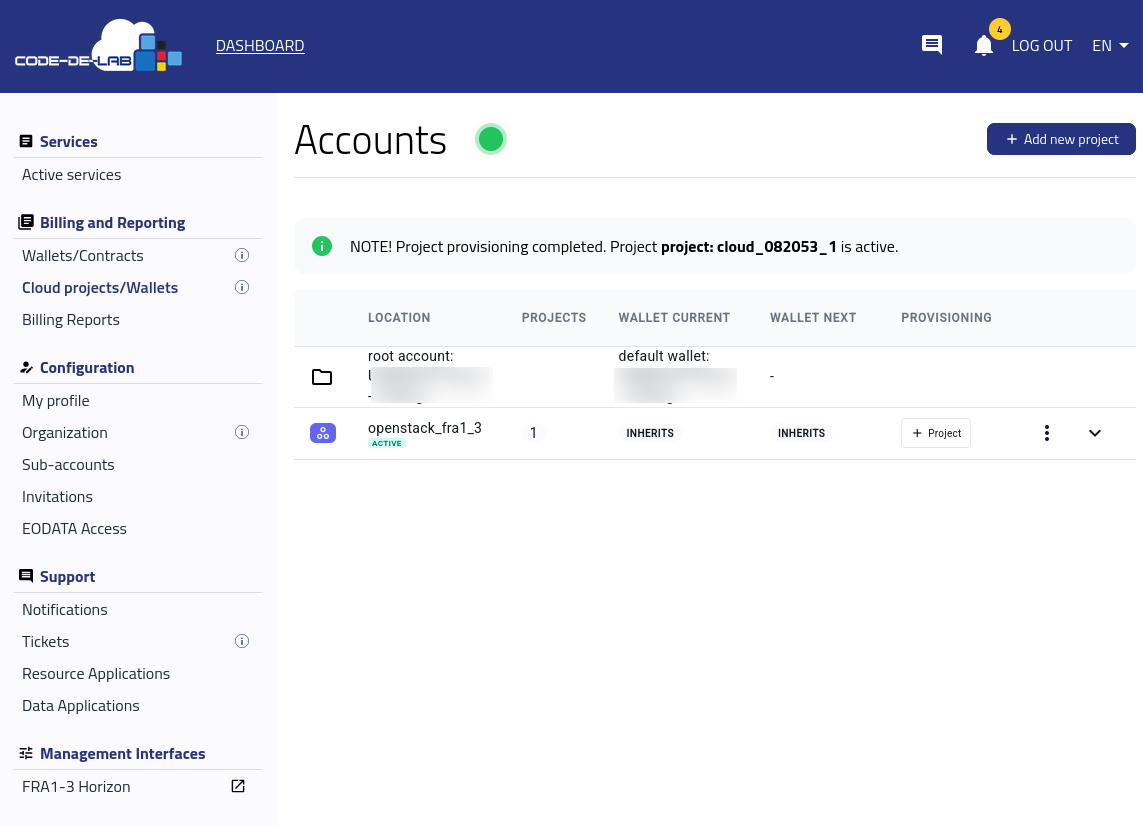
Dashboard view showing the Cloud projects/Wallets section, where all project and wallet details are listed.
This view shows the FRA1-3 row and its active projects.
The following sections break down the project activation and billing setup process into a series of steps.
Projects in the Dashboard
Add a cloud project
To activate a new project, click + Project in the FRA1-3 row. The same action is available through Add new project in the upper-right corner of the tab.
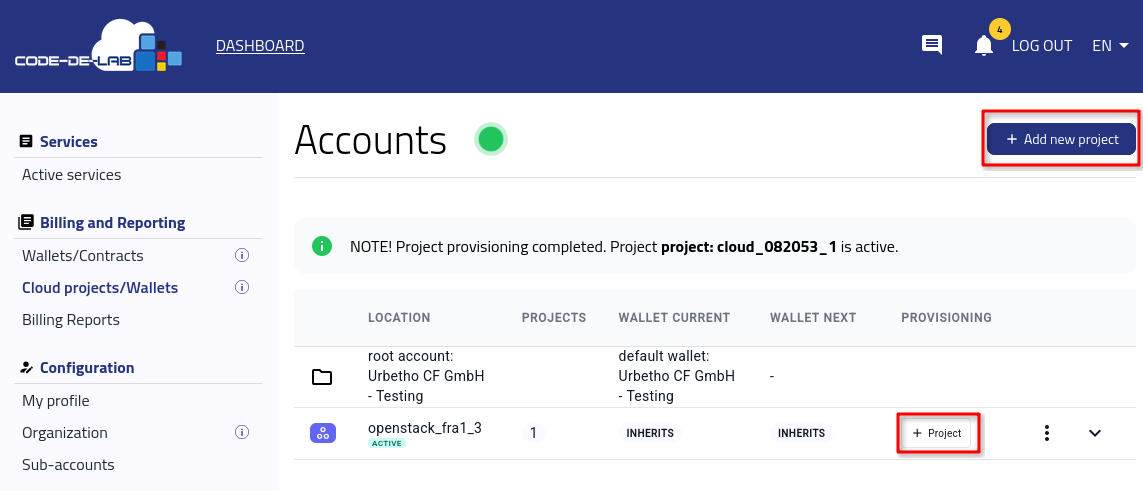
Root account, FRA1-3, and its projects in the Dashboard.
Activate project in the Dashboard
Important
Only one project activation can run at a time. If you need to add additional projects, please wait until the current activation request is completed. You can monitor its progress in the project list.
The project form uses FRA1-3 as the cloud. Enter a project name or leave the field empty to let the system generate one, confirm that Cloud shows fra1-3, and click Add new project.
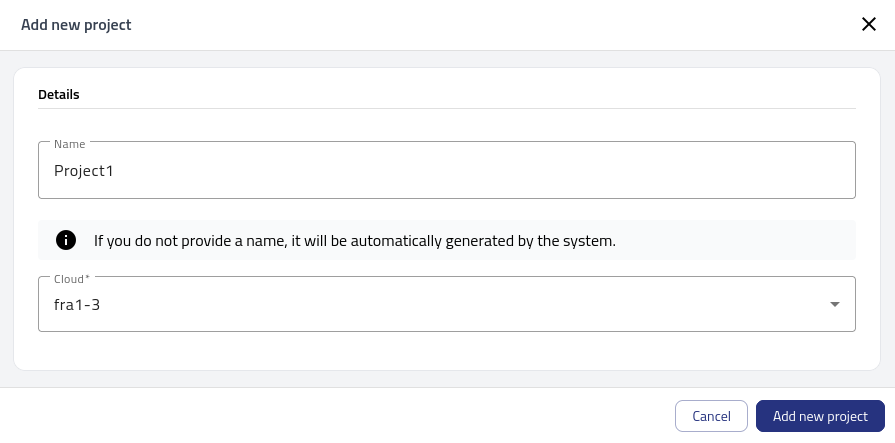
Adding a new project in FRA1-3.
A message appears indicating that activation is in progress:
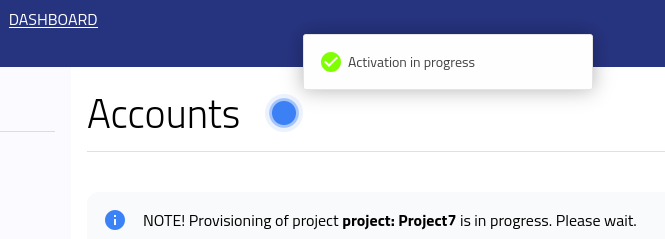
Notification showing that project activation is currently in progress.
When the project is being added, the number of projects increases by 1 and its state changes to IN PROGRESS. After a short while, the status becomes ACTIVATED.
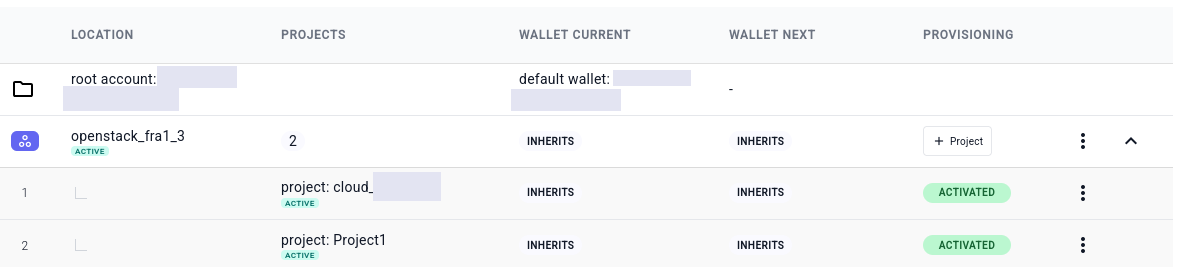
Table showing the updated project count and the activation status changing from IN PROGRESS to ACTIVATED.
Projects in Horizon
Note
The Dashboard manages project and wallet assignments for FRA1-3, while Horizon remains the source of truth for OpenStack quotas and resources.
Log in through https://identity.cloudferro.com/auth/realms/CODE-DE3/account/, select CODE-DE3 under Authenticate using, choose FRA1-3 as the region, and click Sign In.
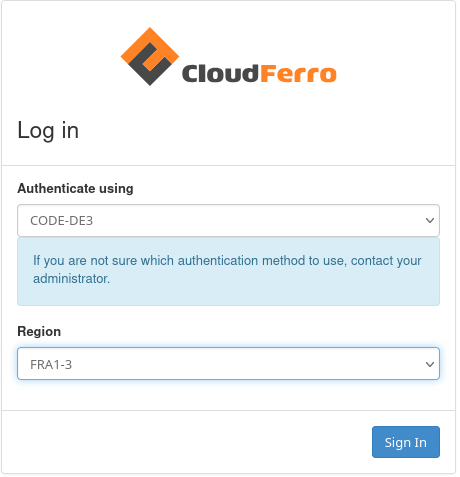
Horizon login with CODE-DE3 and FRA1-3 selected.
In Horizon, open Identity → Projects from the left menu to list the available projects:
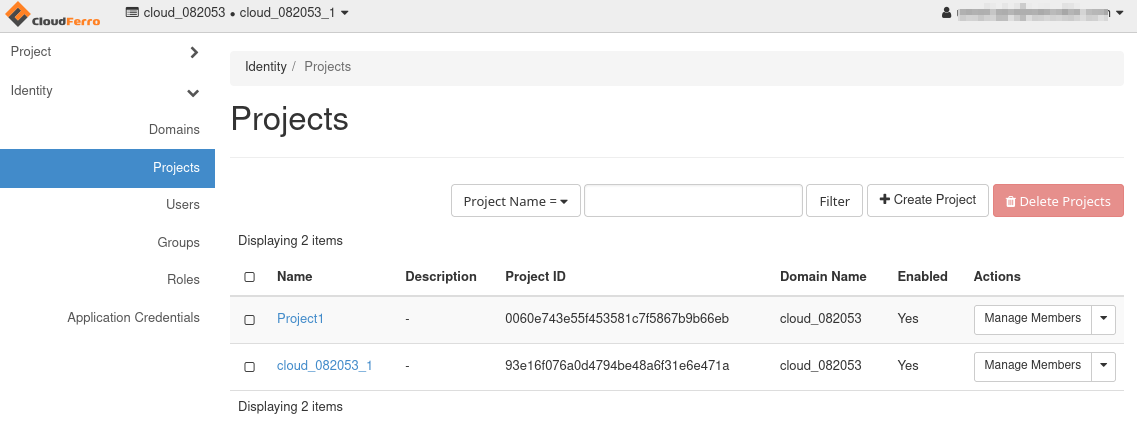
List all active projects in Horizon.
In the upper-left corner, you can view the available projects in the drop-down menu:
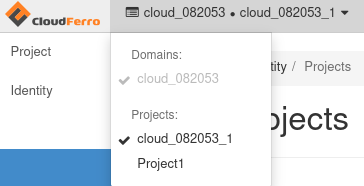
Horizon interface showing the list of projects available for the logged-in user.
For a new project, the resources are allocated in the usual manner:
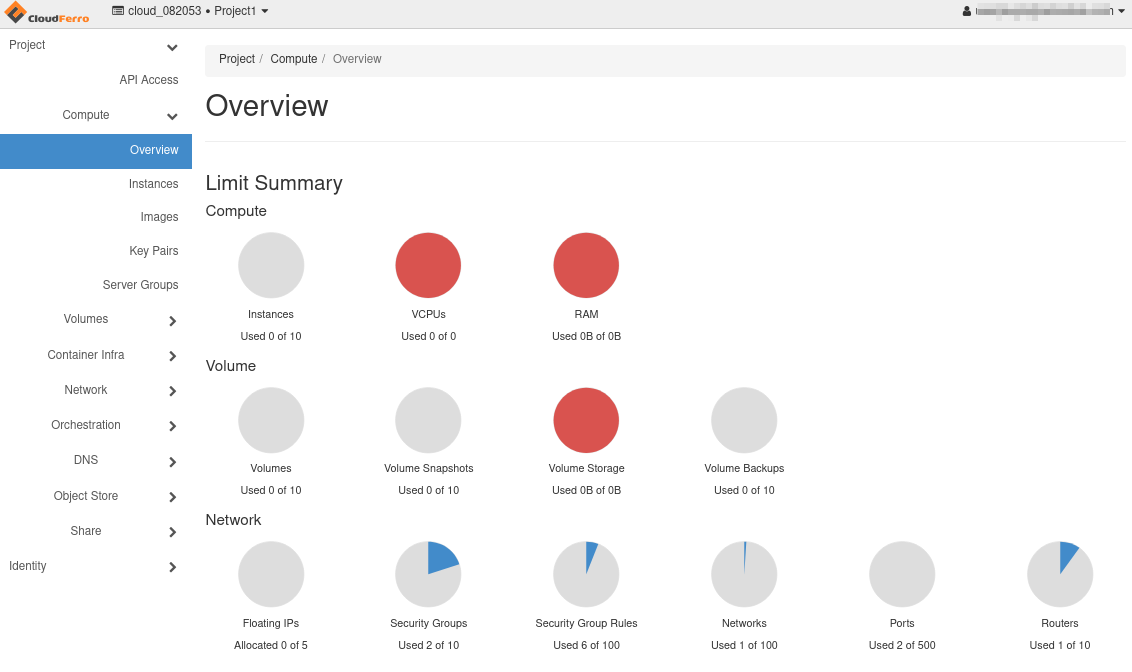
Project quotas for a brand new project.
If one or more projects have already been used to create resources (for example, virtual machines), the number of instances and RAM used will no longer be 0.
Attaching wallets to projects in the Dashboard
Initially, the account has one active wallet. A wallet assigned to the FRA1-3 row is inherited by its projects unless a different wallet is assigned at project level.
The current wallet defines the active billing source, while the next wallet allows you to schedule a future switch without interrupting services.
You can attach a wallet to the FRA1-3 row or to a specific project. The FRA1-3 assignment becomes the default for every project under that row.
Attach a wallet to FRA1-3
Attach the appropriate wallet to the FRA1-3 row to define the default billing source for its projects.
To change the assignment, click the three-dots menu in the FRA1-3 row and choose whether to modify the current or next wallet:
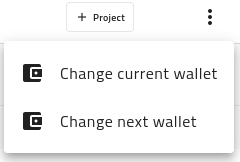
Options menu for editing the current or next wallet assigned to FRA1-3.
This opens a new entry window:
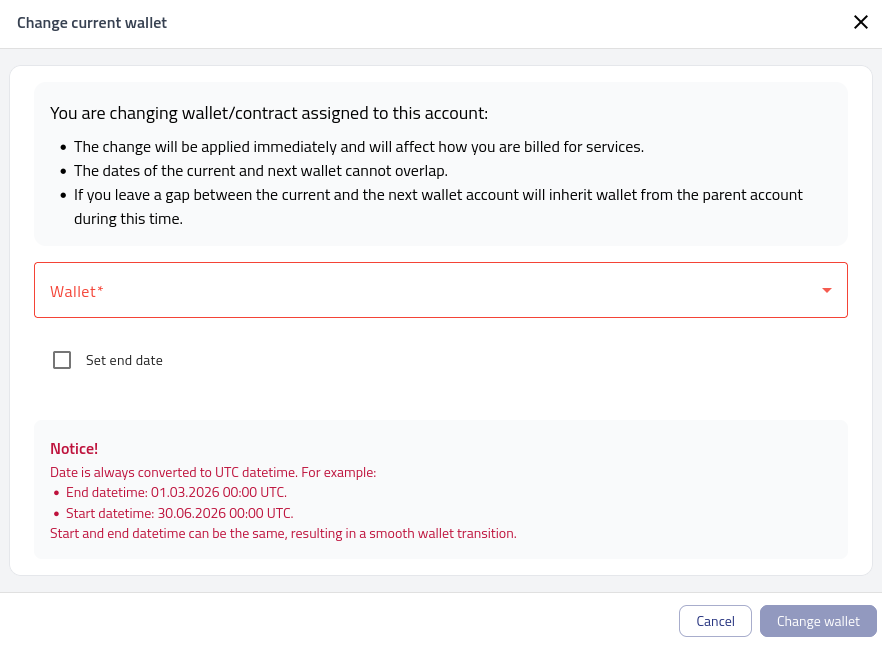
Form for assigning or scheduling a wallet change for the selected project.
Note
The following conditions apply when changing wallets:
The change of wallet takes effect immediately and affects how you are billed for services.
The dates of the current and next wallet cannot overlap.
If you leave a gap between the current and next wallet, the account inherits the wallet from the parent account during that time.
Verify the billing mode
You can verify the billing mode of each project once you have created your resources (for example, virtual machines).
Ensure that the project uses the intended wallet or contract. To review wallet states and available credits, open Wallets/Contracts in the Dashboard.
Refer to Wallets and Contracts Management for details.
In Active services, keep Cloud Region set to FRA1-3 and filter by project: cloud_901089_2 to display the related entries:
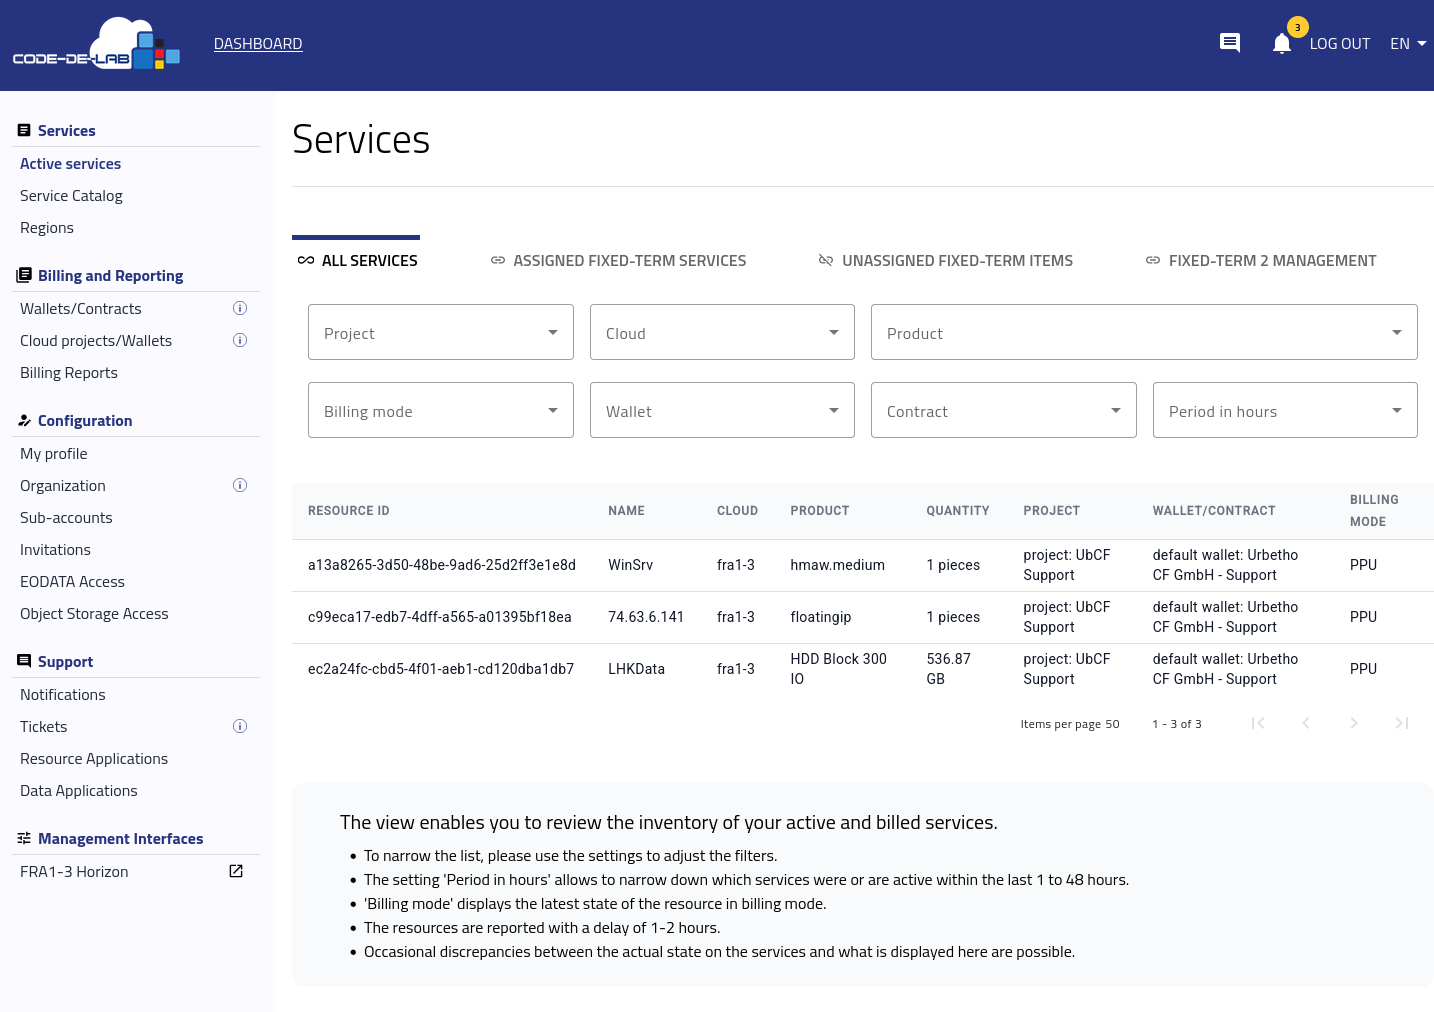
Active services for a specific FRA1-3 project.
Note
Active services are being updated with a delay of 2–3 hours.
Confirm proper tracking
Confirm proper tracking of all financial transactions within the system to ensure accurate billing and reporting.
Use the Billing Reports option to review FRA1-3 usage and costs by project, product, billing mode, wallet, or contract.
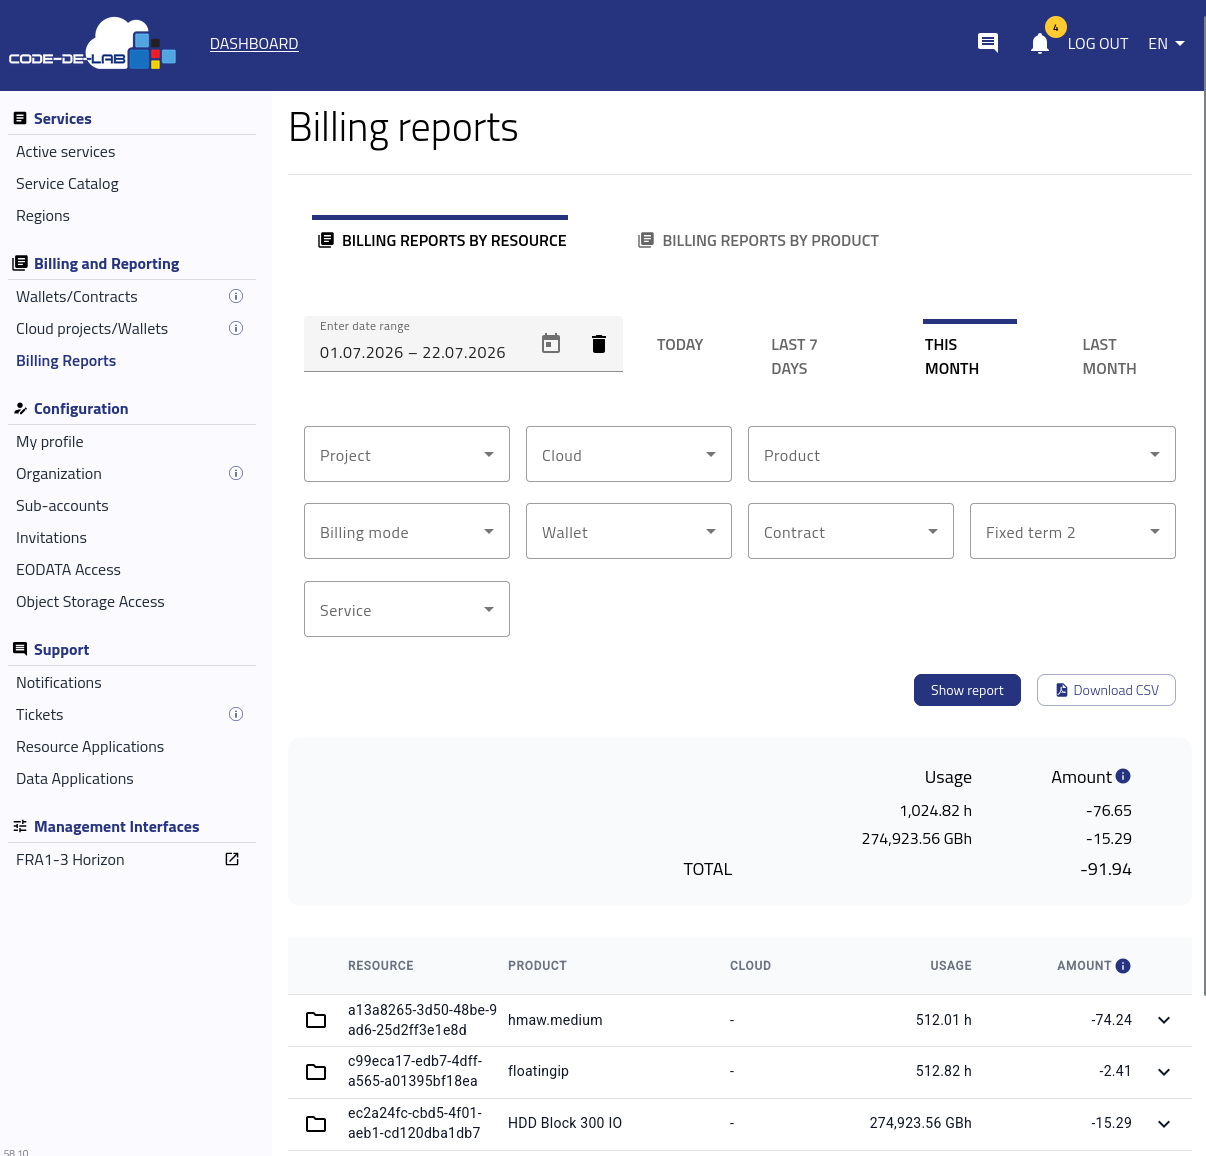
Billing Reports page displaying project usage and associated billing data.
For CODE-DE-Lab reports, set Cloud Region to FRA1-3, then use Project and Wallet to narrow the results.
Working with existing projects
To manage an existing project, click the three-dots menu in its row. The menu contains View project, Extend project, Change current wallet, and Change next wallet; Extend project is not applicable because FRA1-3 is the only configured region.
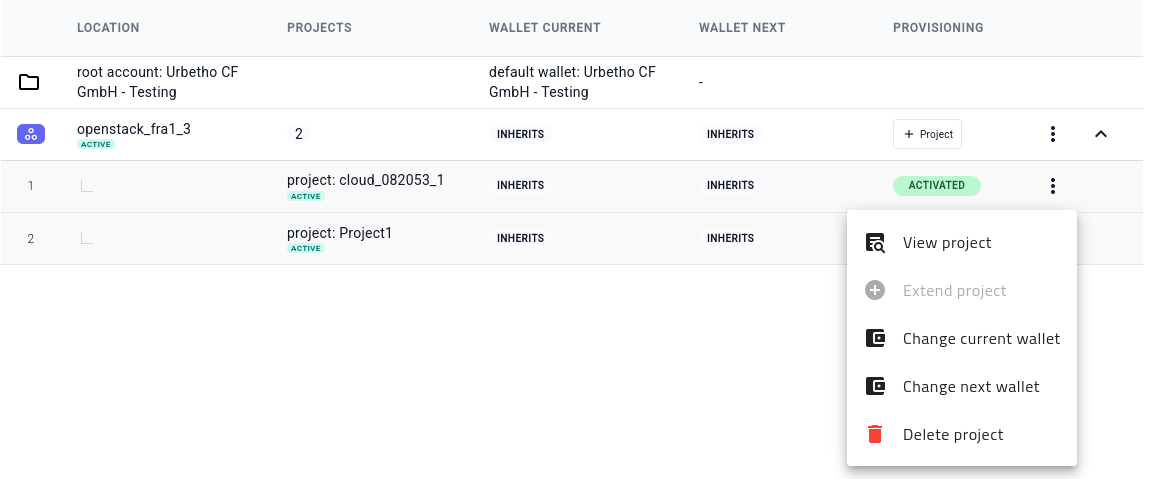
Project menu showing available actions, including View project and Extend project.
View project
Select View project to open a detailed overview of the resources assigned in FRA1-3:
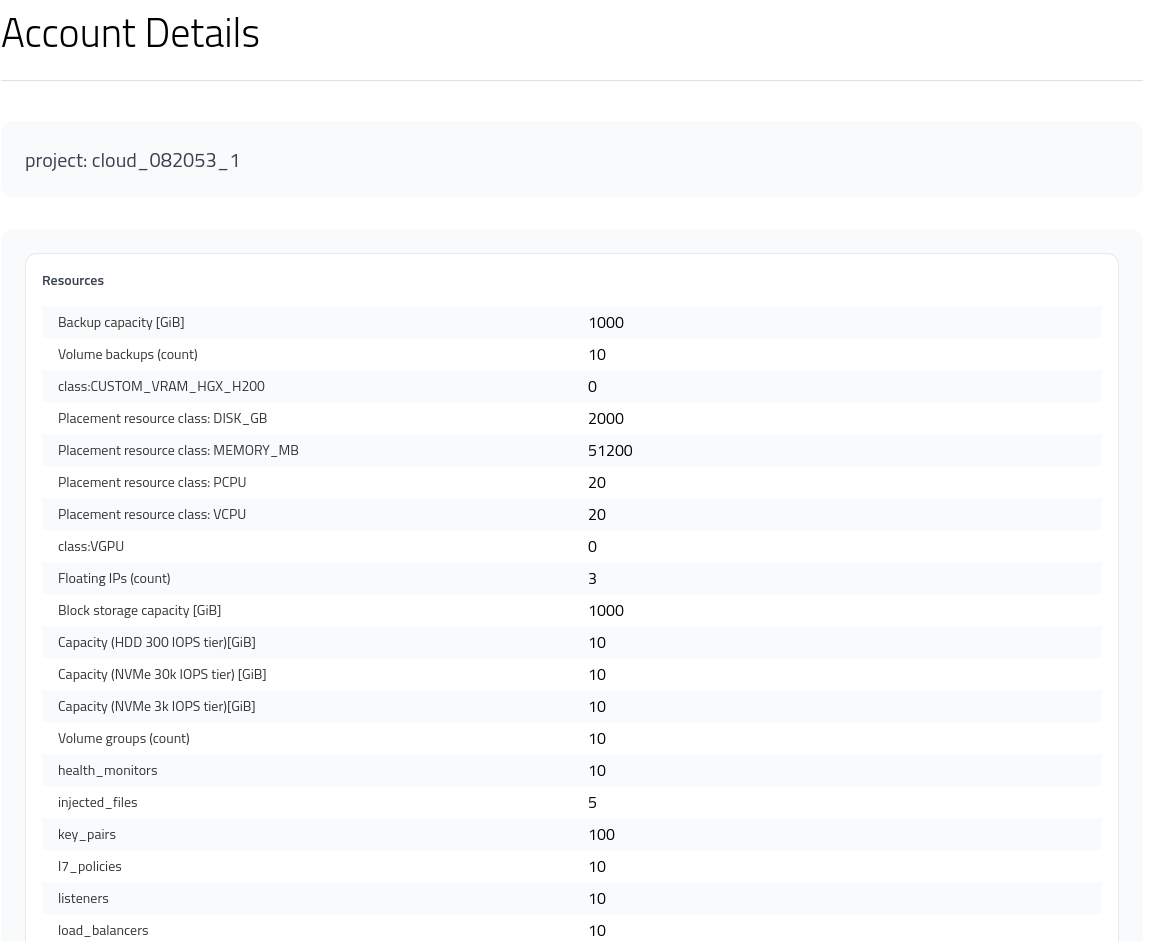
Detailed project overview showing resource allocation in FRA1-3.
Change current wallet at project level
Changes the current wallet for one project instead of using the wallet inherited from the FRA1-3 row.
Change next wallet at project level
Works similarly and changes the next wallet at the project level.
Deleting projects
At the time of writing, projects can only be deleted in Horizon (OpenStack), and this does not immediately produce any change in the Dashboard.

Deleting a project using Horizon.
Troubleshooting
Activation stuck IN PROGRESS: refresh the Dashboard, verify quotas in Horizon, and confirm that you have permission to create projects in FRA1-3.
Wallet change rejected: ensure current and next date ranges do not overlap; verify the wallet has funds/validity.
What to do next
After the project status changes to ACTIVATED, open Horizon in FRA1-3 and confirm that the project is available. If the required quota or service has not yet been allocated, submit the appropriate application through Submitting Resource Applications on CODE-DE-Lab and follow its ticket until provisioning is confirmed.
When resources begin generating usage, follow Billing reports on CODE-DE-Lab to filter the charges by FRA1-3, project, and wallet. Allow for the documented reporting delay before investigating recently created resources or wallet changes.