How to restore volume from snapshot on CODE-DE
In this article, you will learn how to restore volume from volume snapshot using Horizon dashboard or OpenStack CLI client.
This can be achieved by creating a new volume from existing snapshot. You can then delete the previous snapshot and, optionally, previous volume.
Prerequisites
No. 1 Hosting
You need a CODE-DE hosting account with access to Horizon interface: https://cloud.fra1-1.cloudferro.com/auth/login/?next=/
No. 2 A volume snapshot
You need to have a volume snapshot which you want to restore.
No. 3 OpenStack CLI client
If you want to interact with CODE-DE cloud using the OpenStack CLI client, you need to have it installed. Check one of these articles:
Once you have installed this piece of software, you need to authenticate to start using it: So aktivieren Sie den OpenStack-CLI-Zugriff auf die CODE-DE-Cloud mit Ein- oder Zwei-Faktor-Authentifizierung
What We Are Going To Cover
Restoring volume snapshot using Horizon dashboard
Restoring volume snapshot using OpenStack CLI client
Restoring volume snapshot using Horizon dashboard
Navigate to the Volumes -> Snapshots section of the Horizon dashboard:
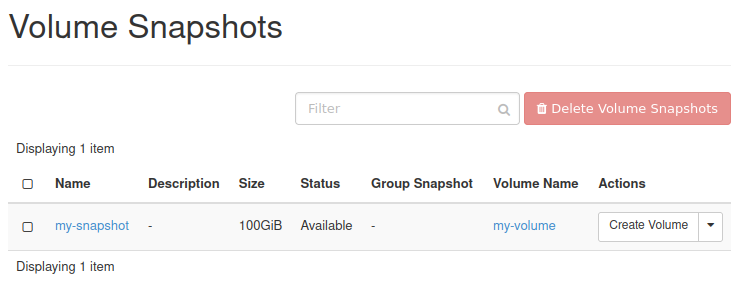
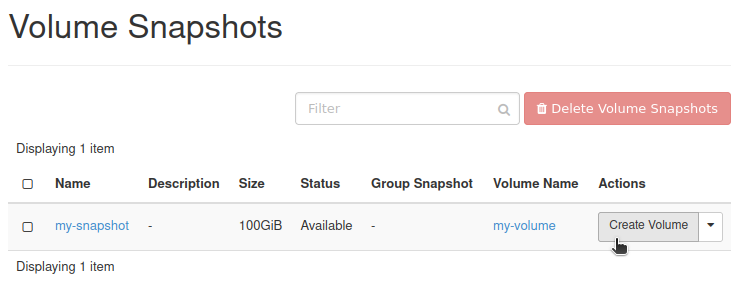
From the row representing the snapshot you want to restore, in the Actions column choose Create Volume:
You should get the window similar to this:
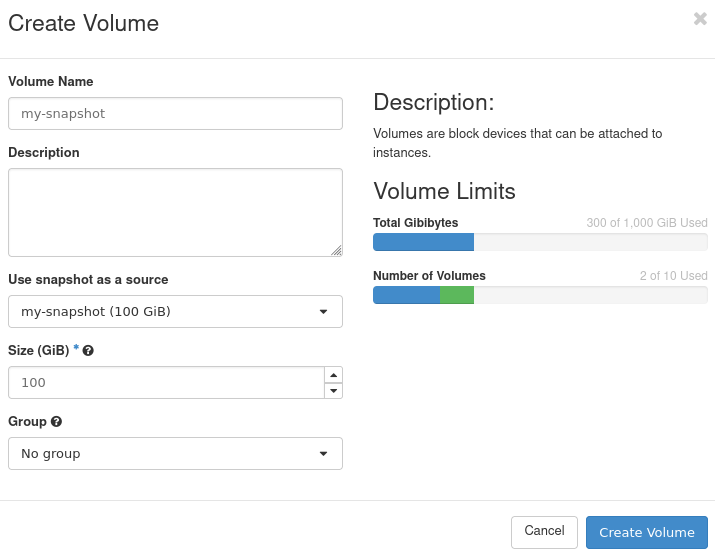
If you want your new volume to have a different name than your snapshot, enter the name of your choice in text field Volume Name.
In this example, we will name our new volume my-restored-volume.
Click Create Volume.
You should now be transferred to section Volumes -> Volumes of the Horizon dashboard. Your newly created volume should be there (in this example, its name was marked with a blue rectangle):
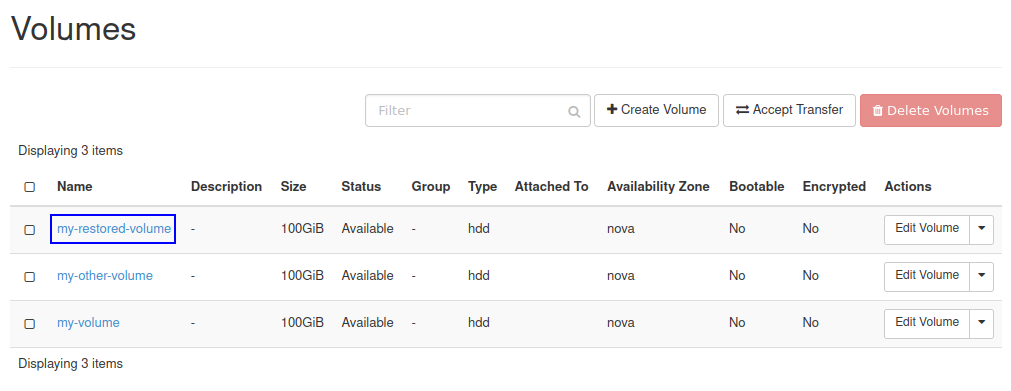
Make sure that the volume has the following Status: Available.
Restoring volume snapshot using OpenStack CLI client
Execute the following command:
openstack volume snapshot list
You should see the list of snapshots of your volumes:

Write somewhere down the ID of the snapshot from which you want to create a volume:
In this example, we want to restore the snapshot called my-snapshot. Its ID, marked on screenshot above with a blue rectangle, is d0f384be-3e61-49a4-8742-70929d22032e
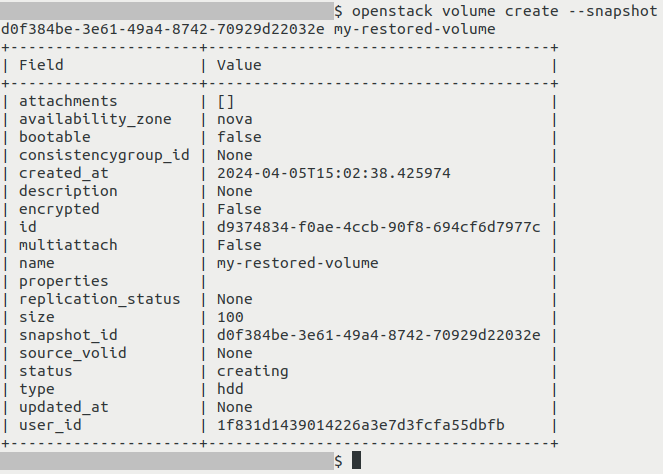
To create a volume from your snapshot, execute command below, after replacing values as instructed.
openstack volume create --snapshot d0f384be-3e61-49a4-8742-70929d22032e my-restored-volume
Replace:
d0f384be-3e61-49a4-8742-70929d22032e with the ID of your volume snapshot
my-restored-volume with the name you want to give to your new volume
You should get output similar to this:
List volumes:
openstack volume list
Your new volume should now be on the list:

Make sure that newly created volume has the following Status: available.
What To Do Next
You can now connect your new volume to a virtual machine and/or delete the previous one.
The following article includes information how to connect a volume to a virtual machine: Verschieben von Datenvolumen zwischen VMs mit OpenStack CLI auf CODE-DE
To learn how to delete a volume snapshot, see this article How to create or delete volume snapshot on CODE-DE
Volume you’ve just created can also be migrated to another project on the same cloud. This can be done by following one of these articles: